Once you have defined a Modem, a Dial up Network Connection needs to be defined so as to establish the connection to the Internet.
Select Network Dial up Connections as shown in
Figure (01)
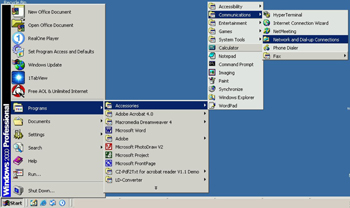
Figure (01)
Choose Make New Connection, then Network
Connection Wizard helps in setting up the connection.
When the window appears as shown in Figure (02), press
next.
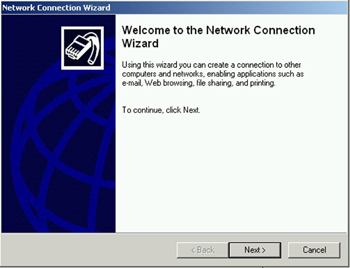
Figure (02)
Choose Dial-up to the Internet as shown in Figure
(03), and press next.
Figure (03)
In the new window select, I want to Set-up
Internet connection manually and press next. Figure
(04)
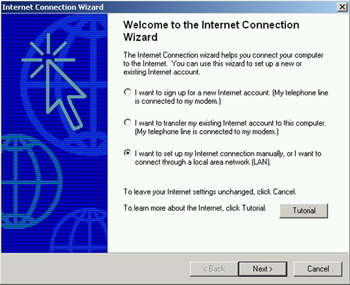
Figure (04)
Select Connect through phone line and modem from
as shown in Figure (05) and press next.

Figure (05)
Select Standard 19200 bps Modem as a modem to be
used and press next
Figure (06)
Figure (06)
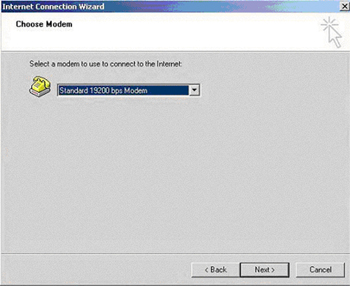
Figure (06)
As shown in Figure (07), enter 1722 in the
[Telephone Number] field and uncheck [use area code and
dialing rules] if been checked.
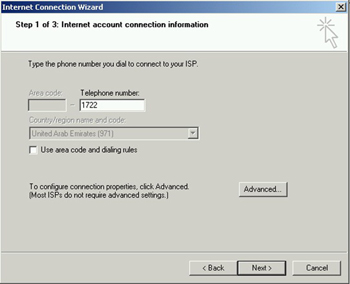
Figure (07)
Supply blank fields for both for user name and
password prompted by the wizard as shown in Figure
(08).
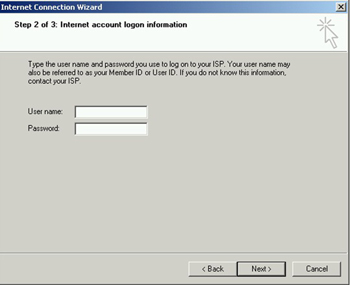
Figure (08)
Ignore the two warning messages for the username
and password [Figure (09) and (10)] by clicking yes
button.
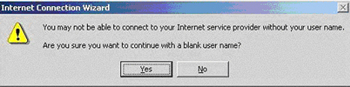
Figure (09)
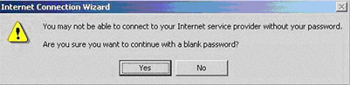
Figure (10)
Provide any name for your connection just like
[Thuraya Internet Connection] as shown in Figure
(11).
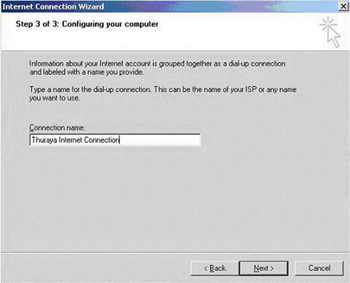
Figure (11)
To connect immediately to the Internet check the
box and press next, otherwise uncheck the box and press
next as shown in Figure (12).
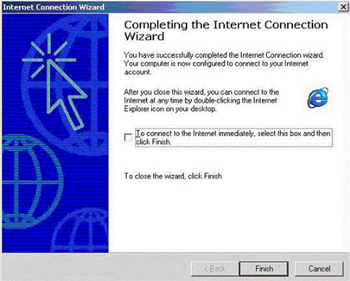
Figure (12)
You may connect later at anytime using your saved
connection, Choose Settings, Network and Dial-up
Connections from your Windows main menu, and then select
the connection by its name as shown in Figure (13)
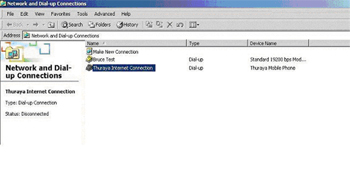
Figure (13)
Make sure that the username and password fields
are empty in the window that appears after opening the
Connection as shown in Figure (14).
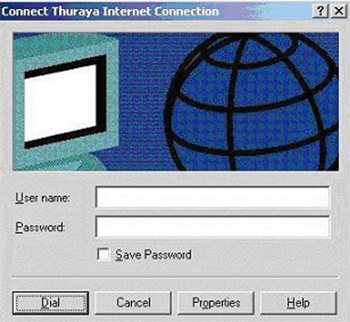
Figure (14)
Press dial and wait until connection establishes
and shows in the right bottom corner as in Figure
(15).

Figure (15)
Welcome aboard, and thank you for using our services.